CloudKit
作为 iOS 开发者,如果想自己独立制作应用,有时可能需要写一些后端代码。即使对于能够胜任这项工作的移动开发者而言,这不仅意味着要写代码,跟多的是长期维护。最糟糕的情况可能并不是大家不喜欢你的应用,而是在巨大流量压力下你的服务器宕机了。
幸运的是,现在我们有 CloudKit 了。苹果替我们操心这些事情,你只管让应用变得完美。
什么是 CloudKit?
在此之前可能你已经知道 iCloud Drive 了——iCloud Drive 是可以存储用户数据和文件的地方,以便在其他设备也能够访问。CloudKit 则是帮助我们在应用里也能够轻松访问这些数据的框架。
CloudKit 提供 API 让你能够访问 iCloud 服务器;它可以使用用户的 iCloud 账户来创建一个用户,并且拥有可供每个用户访问的公开权限的数据库,以及每个用户自己的私有数据库来存储信息;你也可以通过 CloudKit 的文件存储系统来存储结构化数据和大文件;这一切都不仅仅发生在用户本地,数据被存储在云端,用户可以在任意其它设备上访问。
总的来说,CloudKit 是你所熟知的数据库、文件存储、用户认证系统的集合服务。有了 CloudKit 的帮助,你不需要担心这些数据库什么的,只要专注在应用开发上就好了。
开始使用 CloudKit
想象现在你正在构建一个签到类的应用,用户可以添加一些带有位置信息的「地点」,也可以在这些地点签到。下面我们就讲讨论如何使用 CloudKit 构建这个应用所需要的基本功能。
开启 CloudKit
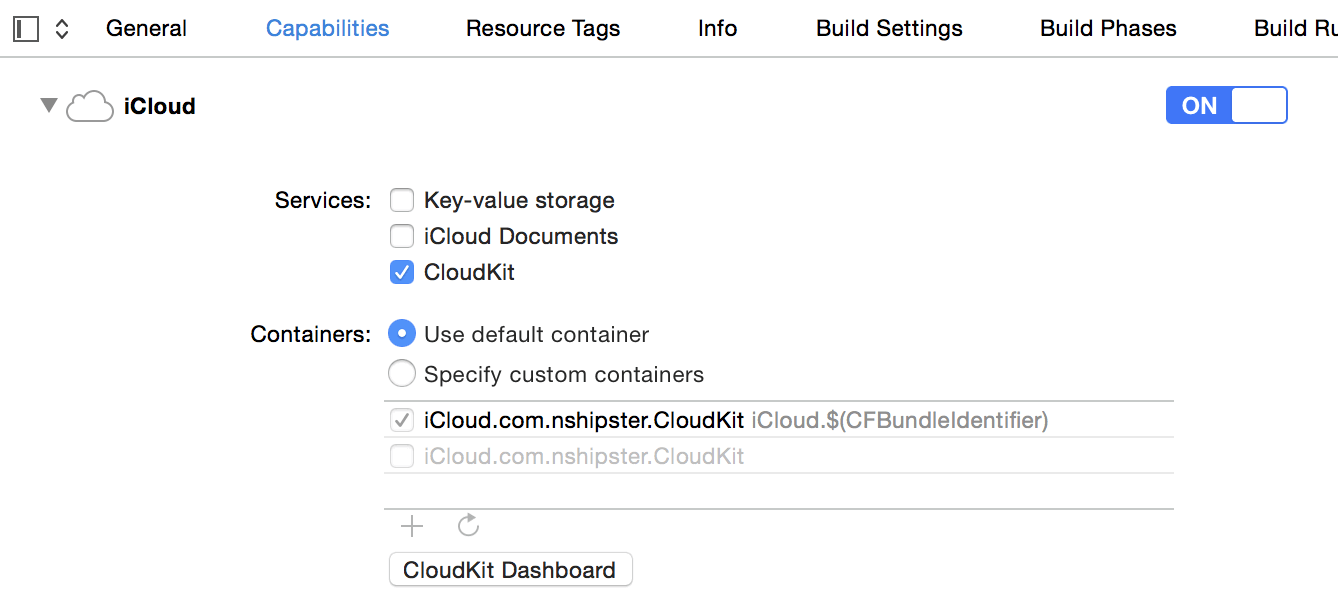
既然 CloudKit 这么强大,那么我们就来看看如何开启它。很简单,在 Xcode 的项目设置界面打开 iCloud 开关并勾选 CloudKit 就可以了:
CloudKit 基础对象类型
CloudKit 的基础对象类型有 7 种。这些对象类型可能和你在其他编程领域了解的类似对象类型稍有差别。
CKContainer: Containers 就像应用运行的沙盒一样,一个应用只能访问自己沙盒中的内容而不能访问其他应用的。Containers 就是最外层容器,每个应用有且仅有一个属于自己的 container。(事实上,经过开发者授权配置 CloudKit Dashboard 之后,一个应用也可以访问其他应用的 container。)CKDatabase: Database 即数据库,私有数据库用来存储敏感信息,比如说用户的性别年龄等,用户只能访问自己的私有数据库。应用也有一个公开的数据库来存储公共信息,例如你在构建一个根据地理位置签到的应用,那么地理位置信息就应该存储在公共数据库里以便所有用户都能访问到。CKRecord: 即数据库中的一条数据记录。CloudKit 使用 record 通过 k/v 结构来存储结构化数据。关于键值存储,目前值的架构支持 NSString、NSNumber、NSData、NSDate、CLLocation,和 CKReference、CKAsset(这两个下面我们会说明),以及存储以上数据类型的数组。CKRecordZone: Record 不是以零散的方式存在于 database 之中的,它们位于 record zones 里。每个应用都有一个 default record zone,你也可以有自定义的 record zone。CKRecordIdentifier: 是一条 record 的唯一标识,用于确定该 record 在数据库中的唯一位置。CKReference: Reference 很像 RDBMS 中的引用关系。还是以地理位置签到应用为例,每个地理位置可以包含很多用户在该位置的签到,那么位置与签到之间就形成了这样一种包含式的从属关系。CKAsset: 即资源文件,例如二进制文件。还是以签到应用为例,用户签到时可能还包含一张照片,那么这张照片就会以 asset 形式存储起来。
Convenience API
Convenience API 顾名思义是对 CloudKit 操作的便利 API。利用 Convenience API 就可以对 record 进行数据的三种基本操作:存储、读取、更改。
那么,继续完善我们的签到应用吧!开始前记得应用 CloudKit 框架并获得公开数据库的引用:
import CloudKit
// ...

let publicDB = CKContainer.defaultContainer().publicCloudDatabase
#import <CloudKit/CloudKit.h>
// ...

CKDatabase *publicDB = [[CKContainer defaultContainer] publicCloudDatabase];
下面,新建一个位置信息并存储:
let greatID = CKRecordID(recordName: "GreatPlace")
let place = CKRecord(recordType: "Place", recordID: greatID)

publicDB.saveRecord(place) { savedRecord, error in
    // handle errors here
}
CKRecordID *greatID = [[CKRecordID alloc] initWithRecordName:@"GreatPlace"];
CKRecord *place = [[CKRecord alloc] initWithRecordType:@"Place" recordID:greatID];

[publicDB saveRecord:place completionHandler:^(CKRecord *savedPlace, NSError *error) {
    // handle errors here
}];
因为 CloudKit 在异步运行 saveRecord:completionHandler: 时会使用网络与服务器交互,网络状况是不定的,所以 一定 记得要在 block 中处理错误,一个好的应用应当有完善的错误处理机制。
你需要检查 NSError 对象来确定正在处理哪种错误。例如,无网络线连接的时候会触发 CKErrorNetworkUnavailable 类型的错误,然后你需要做的就是失败后重试。等等,那么要什么时候重试呢?立刻,还是十秒之后?别担心,CloudKit 在 error 的 userInfo 字典中提供了一个建议的重试时间 CKErrorRetryAfterKey:
if let retryAfterValue = error.userInfo[CKErrorRetryAfterKey] as? NSTimeInterval {
    let retryAfterDate = NSDate(timeIntervalSinceNow: retryAfterValue)
    // ...
}
double retryAfterValue = error.userInfo[CKErrorRetryAfterKey];
NSDate *retryAfterDate = [NSDate dateWithTimeIntervalSinceNow:retryAfterValue];
下面,获取一个位置信息:
let greatID = CKRecordID(recordName: "GreatPlace")

publicDB.fetchRecordWithID(greatID) { fetchedPlace, error in
    // handle errors here
}
CKRecordID *greatID = [[CKRecordID alloc] initWithRecordName:@"GreatPlace"];

[publicDB fetchRecordWithID:greatID completionHandler:^(CKRecord *fetchedPlace, NSError *error) {
    // handle errors here
}];
更改一个已经存在的位置信息:
let greatID = CKRecordID(recordName: "GreatPlace")

publicDB.fetchRecordWithID(greatID) { fetchedPlace, error in
    guard let fetchedPlace = fetchedPlace else {
        // handle errors here
        return
    }

    let name = fetchedPlace["name"] as? String ?? "Unnamed Place"
    fetchedPlace["name"] = name + " Door A"

    publicDB.saveRecord(fetchedPlace) { savedPlace, savedError in
        //...
    }
}
CKRecordID *greatID = [[CKRecordID alloc] initWithRecordName:@"GreatPlace"];

[publicDB fetchRecordWithID:greatID completionHandler:^(CKRecord *fetchedPlace, NSError *error) {
    if (fetchedPlace != nil) {
        NSString *name = fetchedPlace[@"name"];
        fetchedPlace[@"name"] = [name stringByAppendingString:@" Door A"];

        [publicDB saveRecord:fetchedPlace completionHandler:^(CKRecord *savedPlace, NSError *savedError) {
            //...
        }];
    } else {
        // handle errors here
    }
}];
更改已存在记录非常简单,只需要将其获取、更改、保存即可。这里你需要关心的是 如何 作者三个步骤,特别是当依赖其他 record 来更新一个 record 的时候。
不好的实现:
database.fetchRecordWithID(recordID, completionHandler: { record, error in
    //...
    database.fetchRecordWithID(otherRecordID, completionHandler: { otherRecord, otherError in
        //...
        database.saveRecord(record!, completionHandler: { anotherRecord, anotherError in
            //...
        })
    })
})
[database fetchRecordWithID:recordID completionHandler:^(CKRecord *record, NSError *error) {
    //...
		[database fetchRecordWithID:otherRecordID completionHandler:^(CKRecord *otherRecord, NSError *otherError) {
		    //...
				[database saveRecord:record completionHandler:^(CKRecord *anotherRecord, NSError *anotherError) {
				    //...
				}];
		}];
}];
这些复杂的嵌套行为很容易让你陷入两难:有超过三个(或者更多)的 block 和错误要处理,那么要在哪一层处理哪种错误呢,如果产生了错误,应该在哪一层等待到什么时候重试呢?在这些恼人的嵌套中处理错误和重试,简直就是一场灾难。
一个更好的解决办法是,使用 NSOperation 的依赖来管理互相依赖的任务:
let firstFetch = CKFetchRecordsOperation()
let secondFetch = CKFetchRecordsOperation()

secondFetch.addDependency(firstFetch)

let queue = NSOperationQueue()
queue.addOperations([firstFetch, secondFetch], waitUntilFinished: false)
CKFetchRecordsOperation *firstFetch = ...;
CKFetchRecordsOperation *secondFetch = ...;

[secondFetch addDependency:firstFetch];

NSOperationQueue *queue = [[NSOperationQueue alloc] init];
[queue addOperations:[firstFetch, secondFetch] waitUntilFinished: NO];
有了这些便利的 API,相信你可以做大部分你想做的工作了。这比起写后端代码、租用服务器、部署维护,然后再写客户端代码去和服务端交换信息要简单多了。
更高级的功能
查询
虽然这些功能已经很强大了,但我们要做一个地理位置签到应用,仅需要这些 API 是不够的。现在是时候添加一个能够根据地点名称查询地点的功能,这就需要 查询 功能了。CKQuery 对象由 RecordType, NSPredicate 和 NSSortDescriptors 组成。
NSPredicate在这里扮演了非常重要的角色,它可以进行字符串的匹配查询,日期的比较查询,甚至还能进行地理位置范围的查询,以及各种组合查询。更为详细的描述见CKQuery相关的文档
如果我想查询名字中含有 Apple Store 的地点:
let predicate = NSPredicate(format: "name CONTAINS 'Apple Store'")
let query = CKQuery(recordType: "Place", predicate: predicate)

publicDB.performQuery(query, inZoneWithID: nil) { results, error in
    // ...
}
NSPredicate *predicate = [NSPredicate predicateWithFormat:@"name CONTAINS 'Apple Store'"];
CKQuery *query = [[CKQuery alloc] initWithRecordType:@"Place" predicate:predicate];

[publicDB performQuery:query
          inZoneWithID:nil
     completionHandler:^(NSArray *results, NSError *error) {
         // ...
     }];
我觉得根据这个例子,你能够很容易自己写出根据用户当前的地理位置查询距离为 1 公里内所有地点的列表。
订阅通知
有了以上的功能我确信你可以构建一个功能完善的应用了,但是不是还缺了点什么呢?
对了,推送通知。推送对于一个签到应用太重要了。
例如,一个社交达人可能想要这样的功能:如果某个签到的描述中提到了 party 的字样,那么就给他发送推送通知告诉他有人签到了一个 party。CloudKit 框架中通过 CKSubscription 类让这一切变为了可能:
let predicate = NSPredicate(format: "description CONTAINS 'party'")

let subscription = CKSubscription(recordType: "Checkin", predicate: predicate, options: .FiresOnRecordCreation)

let info = CKNotificationInfo()
info.alertLocalizationKey = "NEW_PARTY_ALERT_KEY"
info.soundName = "NewAlert.aiff"
info.shouldBadge = true

subscription.notificationInfo = info

publicDB.saveSubscription(subscription) { subscription, error in
    //...
}
CKDatabase *publicDB = [[CKContainer defaultContainer] publicCloudDatabase];

NSPredicate *predicate = [NSPredicate predicateWithFormat:@"description CONTAINS 'party'"];

CKSubscription *subscription = [[CKSubscription alloc] initWithRecordType:@"Checkin" predicate:predicate options:CKSubscriptionOptionsFiresOnRecordCreation];

CKNotificationInfo *info = [CKNotificationInfo new];
info.alertLocalizationKey = @"NEW_PARTY_ALERT_KEY";
info.soundName = @"NewAlert.aiff";
info.shouldBadge = YES;

subscription.notificationInfo = info;

[publicDB saveSubscription:subscription
         completionHandler:^(CKSubscription *subscription, NSError *error) {
             //...
         }];
收到推送通知时,在 app delegate 中处理:
func application(application: UIApplication, didReceiveRemoteNotification userInfo: [NSObject : AnyObject]) {
    let ckNotification = CKNotification(fromRemoteNotificationDictionary: userInfo as! [String : NSObject])
    if ckNotification.notificationType == .Query,
        let queryNotification = ckNotification as? CKQueryNotification
    {
        let recordID = queryNotification.recordID
        //...
    }
}
- (void)application:(UIApplication *)application didReceiveRemoteNotification:(NSDictionary *)userInfo{
    CKNotification *ckNotification = [CKNotification notificationFromRemoteNotificationDictionary:userInfo];
    if (ckNotification.notificationType == CKNotificationTypeQuery) {
        CKQueryNotification *queryNotification = ckNotification;
        CKRecordID *recordID = [queryNotification recordID];
        // ...
    }
}
远不止如此
正如我们开始所提到的,CloudKit 能做的还远不止如此。你可以为签到附上图片;对 Checkin 和 Place 之间建立 reference 关联以便能够查询某个地点下的所有签到;甚至,CloudKit 还提供了 API 供你非常方便地查询你通讯录中的好友还有谁也在玩这个应用……
等不及要试试 CloudKit 了?它能让你从编写服务端代码、监控服务器压力、长期维护大量的 CDN、租用服务器等等等等的事情中解脱出来。等等!CloudKit 怎么收费呢,会很贵吗?答案是:免费。目前苹果允许你使用 CloudKit 存储 10 GB 资源,100 M 数据库存储,每天 2 GB 流量;当你的用户数量增加的时候,这些免费额度也相应地增加到 1 PB 存储、10 TB 数据库存储,以及每天 200 TB 流量。
参见 CloudKit cost calculator 页面底部来了解详细的免费额度和收费标准。
WWDC 2015 中提到,CloudKit 已经 不仅 可以在 iOS 和 OS X 上使用,可以在你的网站上集成 CloudKit JS,以便 iCloud 用户可以在浏览器中也能使用相应的功能,或者是使用 CloudKit web service 对 CloudKit 服务端直接进行 HTTP 请求。这意味着,现在其他移动或桌面平台都可以使用 CloudKit 了!
CloudKit 如此迷人,我已经等不及看看 NSHipster 们能够用它做出什么令人惊叹的应用了。
除非另有声明,本文采用知识共享「署名-非商业性使用 3.0 中国大陆」许可协议授权。